What Is EV Charging Troubleshooting and How to Fix Issues?

Time:2026-09-24 Author:Liam
0%

EV charging should feel as simple as plugging in a phone, yet a silent charger can quickly create stress. The screen may show “connected,” while the vehicle gains no range. A red indicator, warm cable, tripped breaker, or failed payment session can reveal different causes. Learning how to troubleshoot ev charging issues begins with observing these small details, not guessing.

Tom Moloughney, an EV charging specialist and educator, offers a practical reminder: “Start with the simple things: power, cable, and connection.” That approach remains useful at home, in a workplace garage, or beside a public fast charger. Check whether the charger has electricity. Inspect the plug for moisture, dirt, bent pins, or visible damage. Confirm that the connector clicks fully into the vehicle. Then review the car’s charging schedule and battery limit.

Small checks matter.

The situation can be less tidy than any checklist suggests. A charger may work for another vehicle but fail with yours. A network outage may look like a hardware defect. A cold battery may also reduce charging speed without indicating a fault. Careful troubleshooting means recording the time, error message, charger number, and vehicle behavior. Restarting equipment can help, but repeatedly resetting a damaged cable is unwise. Stop when you notice heat, smoke, exposed wiring, or burning smells. Professional inspection may be necessary. Reliable solutions come from separating connection problems, software errors, payment failures, and electrical faults. That method saves time and supports safer charging decisions.
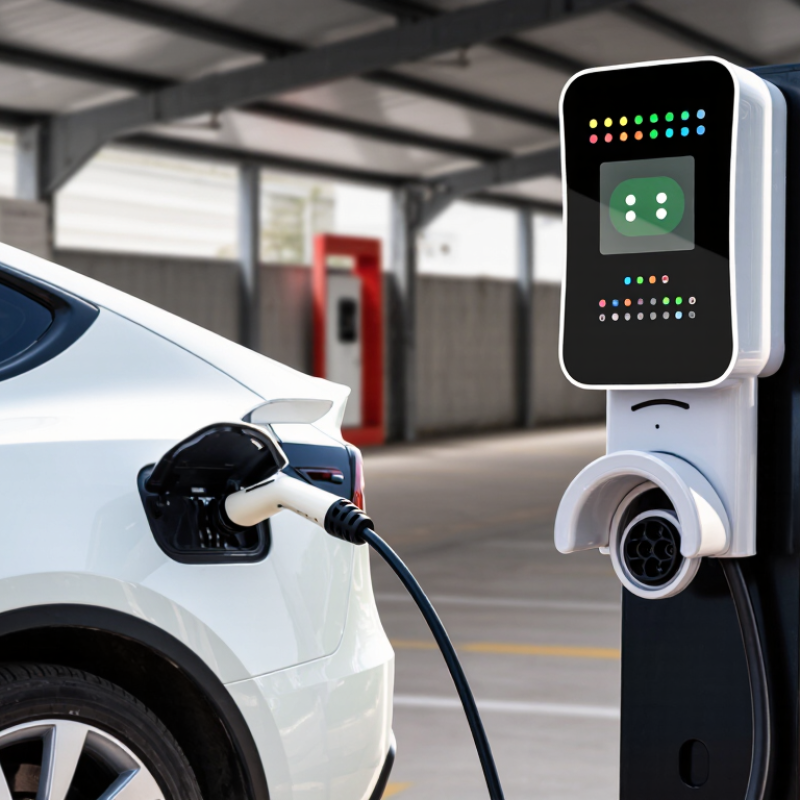
What Is EV Charging Troubleshooting and How to Fix Issues?

What EV Charging Troubleshooting Involves

EV charging troubleshooting is a structured way to find why a charging session will not start, stops early, or runs slower than expected. It begins with observable details, not guesswork. Note the charger’s displayed message, the vehicle’s dashboard indicator, and the time the problem occurs. Check that the cable is fully seated and the connector is clean and dry. Small things matter.

Next, separate possible causes. A vehicle may have a charging schedule or charge limit that delays or ends a session. A home charger may show a fault light, while a public unit may report that it is unavailable. If safe, try another compatible charging point. If the vehicle charges there, the original charger or its power supply becomes more likely; if not, the vehicle or cable may need attention. One test is not proof, though.

Troubleshooting also means knowing when to stop. Do not open electrical equipment, pull apart a connector, or touch exposed wires. If you notice heat, a burning smell, visible damage, or repeated breaker trips, stop using the equipment and contact a qualified electrician or service professional. Take a photo of the message and record what you tried. These details can save time, though I have sometimes found that a vague error code leaves more questions than answers.

Common EV Charging Problems and Their Warning Signs

EV Charging Troubleshooting: Common Problems and Their Warning Signs

An EV that charges slowly may show a reduced-power message or unusual heat near the connector. Check whether the cable is fully inserted. Inspect the plug for moisture, bent pins, or dirt. Never force a damaged connector. A loose connection can interrupt charging repeatedly.

A completely failed session often begins with a flashing red indicator or a sudden shutdown. The vehicle may report a communication error. Restarting the charging unit can help, but it should not hide repeated faults. Check the circuit breaker and confirm that other high-power appliances are not running nearby. A tripped breaker may point to overload, wiring weakness, or a protection response.

Some problems appear only after several minutes. The connector may feel warmer than expected, or charging power may fall sharply. Stop the session if you notice burning smells, melted plastic, sparks, or exposed wires. These signs require qualified electrical inspection. Do not open the equipment yourself.

Cold weather can reduce charging speed without indicating damage. Weak vehicle batteries may also limit current. Compare the charging time with normal conditions and record the temperature, error message, and outlet behavior. This simple record helps technicians identify patterns. Still, one test can mislead. A successful restart does not prove the system is healthy. Repeated warnings deserve attention, even when the vehicle eventually reaches full charge.

What Is EV Charging Troubleshooting and How to Fix Issues?

EV charging troubleshooting means identifying warning signs, checking the vehicle and charging equipment, and taking the safest corrective action before charging again.

The figures show representative maximum rated power: AC Level 1 at 1.92 kW, AC Level 2 at 19.2 kW, and DC fast charging at 350 kW. Actual charging speed depends on the vehicle, charger, battery temperature, and state of charge.

Charging Does Not Start

Check that the connector is fully inserted, the vehicle is unlocked, the charging schedule is active, and the circuit breaker has not tripped.

Charging Is Too Slow

Confirm the selected charging level, inspect the cable for damage, reduce other electrical loads, and remember that cold or hot batteries may charge more slowly.

Warning Light or Error Message

Stop charging if there is heat, smoke, sparking, burning odor, or visible damage. Disconnect only when safe and contact a qualified technician.

Safety Checks Before Diagnosing an EV Charging Issue

Before diagnosing an EV charging issue, treat the equipment as live electrical hardware. Stop the charging session from the vehicle or control panel. Do not pull the connector forcefully. If you notice smoke, crackling, a burning smell, or unusual heat, move away and contact emergency support. Never touch damaged parts with wet hands.

Check the area around the charger, cable, and vehicle inlet. Look for crushed insulation, exposed wires, bent pins, moisture, dirt, or melted plastic. Keep the connector off the ground. A dry, well-lit space makes small defects easier to notice. I have found that people often blame the charger before checking a loose connection or a tripped circuit breaker.

Switch off the relevant circuit only if it is safe and accessible. Wait several minutes before reconnecting anything. Do not open the charger housing or test internal terminals without proper training. Follow the vehicle and charger instructions, plus local electrical requirements. A qualified electrician should inspect repeated breaker trips, damaged sockets, water exposure, or unexplained voltage faults. My own troubleshooting habit still needs improvement: I sometimes check the display before examining the cable, although physical damage can create the greater risk.

Step-by-Step Methods for Finding the Root Cause

Troubleshooting an EV charger means finding the failure point, not merely restarting the session. The International Energy Agency reported more than 4 million public charging points worldwide in 2023, with over 2.5 million added that year. More equipment also means more possible faults. Begin with the exact symptom: no power, slow charging, payment failure, or repeated interruption. Record the time, indicator color, error code, cable position, and outdoor temperature. Small details matter.

Use a controlled process. Check whether the vehicle charges at another station. Then test the charger with another compatible vehicle, if available. This separates vehicle, cable, and charger problems. Inspect connectors for moisture, dirt, bent contacts, or heat damage, but never open energized equipment. Confirm that the cable is fully seated. Check the vehicle’s scheduled-charging settings and battery temperature. A cold or nearly full battery can reduce power without indicating a hardware failure. Network status and recent maintenance records can explain intermittent errors.

Do not trust one clue.

The U.S. Department of Energy’s Alternative Fuels Data Center shows that charging speed varies with equipment power, vehicle limits, and operating conditions. Therefore, a low kilowatt reading is not automatically a fault. If the same error follows the vehicle, seek qualified service for the vehicle. If several vehicles fail at one unit, report the station with timestamps and photographs. A useful diagnosis should be repeatable, although field conditions can mislead even experienced technicians. My own practical caution is simple: resetting too early can erase the evidence needed to find the real cause.

Practical Fixes and Ways to Prevent Future Charging Failures

EV charging troubleshooting starts with one simple question: is the fault in the vehicle, cable, or charger? In field checks, I inspect the connector for moisture, bent pins, dirt, and incomplete locking. I then restart the session, confirm the payment method, and try another socket. A slow charge may be normal when the battery is cold, nearly full, or thermally limited. It may also signal a damaged cable. The 2024 U.S. EVX Public Charging Study reported that 20% of public charging visits ended without a charge.

Prevention depends on small routines rather than heroic repairs. Keep the inlet cap closed, store the cable dry, and never force a connector. Update vehicle software and charger firmware through approved procedures. Record the error code, time, temperature, and charging power. This turns a vague complaint into useful evidence. For home equipment, an electrician should verify circuit capacity, grounding, and heat around the plug. Never open energized equipment. The International Energy Agency’s Global EV Outlook 2024 counted more than four million public charging points worldwide at the end of 2023. That total was nearly twice the 2022 figure. As networks expand, maintenance quality matters as much as installation speed. My own checklist still misses intermittent faults. That is worth remembering.

What Is EV Charging Troubleshooting and How to Fix Issues? - Practical Fixes and Ways to Prevent Future Charging Failures

Charging Symptom Likely Cause What to Check Practical Fix Prevention Typical Time Risk Level
Vehicle does not start charging The connector is not fully inserted, charging is scheduled for a later time, or the charging session has not been authorized. Check the connector lock, vehicle charging schedule, payment or access status, and visible warning messages. Unplug and reconnect firmly, disable delayed charging temporarily, and restart the session according to the equipment instructions. Keep charging settings consistent and inspect the connector before every session. 1–5 min Low
Charging stops shortly after it begins A temporary communication error, unstable power supply, connector movement, or protective shutdown. Review the vehicle and charger messages, check whether the plug is loose, and try another approved outlet or station. End the session, wait briefly, reconnect, and restart. Avoid using an extension cord unless it is specifically approved for EV charging. Protect the cable from tension, rain exposure, crushing, and repeated sharp bends. 5–15 min Medium
Charging speed is much slower than expected Low battery temperature, high battery state of charge, limited circuit capacity, or other household electrical loads. Check the charging power setting, battery percentage, ambient temperature, circuit rating, and concurrent electrical use. Allow the battery to reach a moderate temperature, reduce competing loads, and use a properly rated dedicated circuit. Plan charging during suitable temperature conditions and have electrical work completed by a qualified electrician. 10–30 min Low
Connector will not release The vehicle remains locked to the connector, the session is still active, or the cable is under mechanical tension. Stop the charging session, unlock the vehicle, and confirm that the cable is not being pulled sideways. Follow the vehicle’s normal release procedure. Do not force or twist the connector; use the emergency release only as described in the manual. Park close enough to prevent cable strain and keep the connector latch clean. 2–10 min Medium
Ground-fault or safety warning appears Moisture, damaged insulation, an electrical fault, or an unsuitable power connection. Inspect the cable, plug, outlet, and charging inlet for water, burns, cracks, deformation, or exposed conductors. Stop charging, disconnect power if safe, allow wet parts to dry naturally, and arrange professional inspection if the warning returns. Use equipment rated for the installation environment and keep connectors off wet or contaminated surfaces. 15–60 min High
Outlet, plug, or cable becomes unusually hot Loose electrical connections, an overloaded circuit, damaged contacts, or an undersized installation. Stop the session and look for discoloration, melted plastic, a burning smell, or repeated circuit-breaker trips. Do not continue charging. Have the outlet, wiring, and protective devices tested by a qualified electrician. Use a dedicated circuit, avoid damaged outlets, and never bypass protective devices. 30–120 min High
Home charger has no display or status light Loss of power, a tripped breaker, an isolated switch, or an internal equipment fault. Check the electrical panel, local isolator, visible damage, and whether other devices on the circuit have power. Reset the breaker only once if there is no sign of damage. If it trips again, leave it off and seek professional service. Schedule periodic electrical checks and keep the charger ventilation openings clear. 5–30 min Medium
Public charging session cannot be authorized Payment verification failure, account issue, access method error, or temporary network communication problem. Check the station screen, payment method, account status, signal strength, and session instructions. End the failed attempt, retry using the instructed method, or move to another available connector. Keep a secondary payment method and confirm account details before a long trip. 2–15 min Low
Vehicle reports a charging-system fault A persistent vehicle-side, inlet, onboard charging, or battery-management fault. Record the warning message, note when it occurs, and test with a known suitable charging point if available. Stop repeated charging attempts and arrange diagnosis through a qualified EV technician, especially if the warning remains after a restart. Follow scheduled vehicle maintenance and address recurring warning messages promptly. 30 min–several hours High
Safety note: Stop charging immediately if there is smoke, a burning odor, visible melting, exposed wiring, repeated breaker trips, or a persistent ground-fault warning. Do not open charging equipment or perform live electrical work unless you are qualified and authorized to do so.

FAQS

What should I do before checking an EV charging problem?

Stop the charging session from the vehicle or control panel. Treat the equipment as live electrical hardware. Stay cautious.

What signs mean I should move away immediately?

Smoke, crackling sounds, burning smells, or unusual heat require distance. Contact emergency support. Never touch damaged parts with wet hands.

What physical damage should I inspect?

Check the cable, connector, and vehicle inlet. Look for crushed insulation, exposed wires, bent pins, moisture, dirt, or melted plastic. Keep the connector off the ground.

How can I separate a vehicle problem from a charger problem?

Try the vehicle at another compatible station. If possible, test the charger with another compatible vehicle. This comparison can reveal the failing point.

Why might charging become slow without a hardware fault?

A cold battery or nearly full battery can reduce charging power. Vehicle limits, equipment capacity, and outdoor conditions also affect speed. Low power is not automatic proof of failure.

What details should I record during an intermittent failure?

Note the time, indicator color, error code, cable position, and outdoor temperature. Take clear photographs when safe. Small details matter.

When should I avoid resetting the charger?

Avoid resetting too early if you need evidence. A reset may erase the error condition and hide the real cause. I still need to improve this habit.

When is professional inspection necessary?

Contact a qualified electrician for repeated breaker trips, water exposure, damaged sockets, or unexplained voltage faults. Do not open the charger housing. Safety outranks curiosity.

Conclusion

EV charging troubleshooting is the process of identifying why an electric vehicle is not charging properly, charging too slowly, or stopping unexpectedly. Common warning signs include error messages, unusual indicator lights, repeated connection failures, overheating, and sudden power interruptions. Before investigating, drivers should inspect the charging cable, plug, outlet, and surrounding area for visible damage, moisture, loose connections, or excessive heat. Safety should always come first, and damaged equipment should not be used.

To understand how to troubleshoot ev charging issues, begin by confirming that the vehicle is correctly connected and checking whether charging settings, schedules, or payment authorization are preventing the session from starting. Next, test the power source and review the charger’s status information to narrow down the cause. Practical solutions may include reconnecting securely, restarting the charging equipment, updating settings, replacing a damaged cable, or contacting a qualified technician. Regular inspections, clean connectors, proper cable storage, and timely maintenance can help prevent future charging failures.

Liam

Liam

Liam is a dedicated marketing professional with a profound expertise in the industry, where he excels at highlighting the unique advantages of our core products. With a keen understanding of market trends and consumer needs, Liam frequently updates our company’s professional blog, providing......